Mastering Manual Settings HSSGameStick: A Complete Guide
If you’ve just picked up an Manual Settings HSSGameStick, you’re in for a treat. This little device packs a punch when it comes to bringing back those classic games from your childhood. It’s basically a small HDMI stick that plugs right into your TV, turning it into a retro gaming hub.
No need for fancy setups or extra consoles – just connect it, grab the wireless controllers, and you’re ready to jump into thousands of games from old systems like NES, SNES, Sega Genesis, and even some arcade favorites Manual Settings HSSGameStick . What makes it stand out is how easy it is to tweak things to fit your style. Whether you’re a casual player who wants simple fun or someone who likes to fine-tune every detail for the best performance, the manual settings let you do that.
Think about it Manual Settings HSSGameStick: out of the box, it’s plug-and-play, but diving into the settings opens up a world of customization. You can adjust how sensitive the controls are, remap buttons for different games, and even optimize the display to make those pixelated graphics pop on your modern TV. It’s not just about playing games; it’s about making them feel right for you. For beginners, it might seem a bit overwhelming at first, but once you get the hang of it, you’ll wonder how you played without these tweaks. And for pros, it’s a way to squeeze out every bit of performance, reducing lag and improving response times.
Safety-wise, always make sure your device is updated to avoid any glitches, and handle it carefully – it’s compact but still electronics. This guide will walk you through everything step by step, so you can get the most out of your Manual Settings HSSGameStick without any hassle. Let’s get started on making your gaming sessions epic.
Overview of Manual Settings HSSGameStick
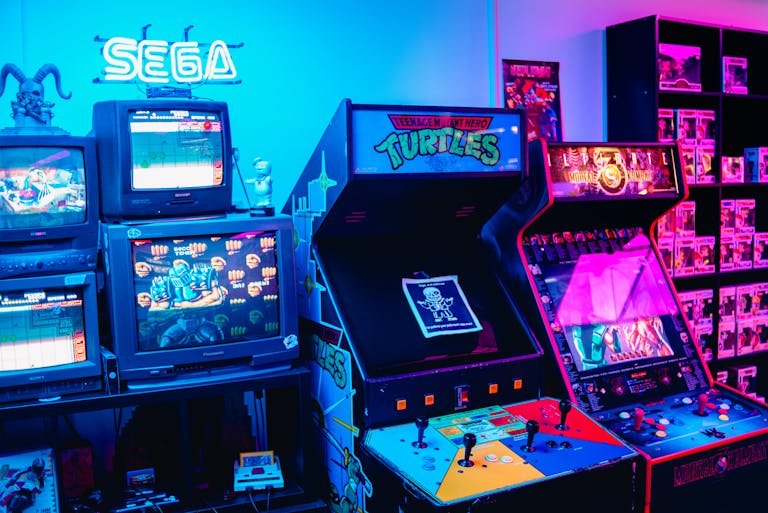
The Manual Settings HSSGameStick is this cool, compact gadget that looks like a beefed-up USB drive but is actually a full-blown gaming console Manual Settings HSSGameStick . You plug it straight into your TV’s HDMI port, and boom – you’ve got access to a huge library of retro games. We’re talking classics from the 80s and 90s, like Super Mario, Sonic the Hedgehog, and Street Fighter, all preloaded so you don’t have to hunt them down. It comes with wireless controllers that feel comfortable in your hands, similar to old-school ones but with modern touches like Bluetooth connectivity. No wires tangling up your living room, which is a big plus.
What I love about it is its simplicity. It’s designed for anyone – kids reliving old memories or adults introducing nostalgia to their families. The hardware inside handles emulation smoothly, meaning it runs those old games without much hiccup on your big screen. It supports up to 4K resolution in some models, so even pixel art looks sharp.
Plus, there’s expandable storage via microSD cards if you want to add more games. It’s portable too; throw it in your bag for trips and plug it into any TV. Just remember, it’s not for the latest AAA titles – it’s all about retro fun. Overall, it’s a budget-friendly way to dive back into gaming history without needing a bunch of old consoles cluttering your space.
Purpose of Manual Settings
Manual settings on the Manual Settings HSSGameStick are there to let you tweak the device so it plays exactly how you want. Out of the box, it’s set up for average use, but everyone has different preferences. Maybe you like your controls super sensitive for quick actions in fighting games, or you need to adjust the screen to fit your TV perfectly. These settings help with that, making sure the games feel smooth and responsive. Without them, you might deal with lag or buttons that don’t quite match your style, which can ruin the fun.
The main goal is customization. You can change things like button layouts, vibration strength, or even how the sound comes out. This is great for competitive play where every millisecond counts, or just for comfort during long sessions. It also helps with compatibility – some TVs or controllers might need a little nudge to work best. By using these, you turn a basic plug-in device into something personal. It’s empowering, especially if you’re used to one-size-fits-all gadgets. Plus, it extends the life of your games by making them feel fresh with new controls. In short, manual settings bridge the gap between old games and modern expectations, ensuring you get the optimal experience every time you pick up the controller.

Target Audience
This guide is aimed at a mix of folks who own or are thinking about getting an Manual Settings HSSGameStick. First off, casual gamers who just want to plug in and play some old favorites without fuss. You might not dive deep into settings, but knowing the basics can make things better. Then there are competitive players – those who enter tournaments or play seriously. For you, tweaking sensitivity and response times is key to getting an edge.
Advanced users, like tech enthusiasts who love customizing gadgets, will find the deeper options exciting. Maybe you’re into emulation and want to add games or fine-tune emulators. Families too – parents setting it up for kids, ensuring it’s safe and easy. Even beginners who are new to retro gaming can benefit; the simple words here make it approachable. No matter your age or skill, if you enjoy nostalgia or quick fun sessions, this is for you. It’s not for hardcore modern gamers looking for high-end graphics, but for anyone appreciating classic vibes. Basically, if you want to squeeze more joy out of your device, you’re the target.
Safety and Compatibility Notes
Before messing with settings, keep safety in mind. Always unplug the Manual Settings HSSGameStick when not in use to avoid overheating or electrical issues. It’s a small device, so don’t leave it in hot spots like direct sunlight. When updating firmware, use official sources only – downloading from sketchy sites could brick your stick or introduce bugs. Compatibility is important too; it works with most HDMI TVs, but older models might need adapters for better picture.
Check if your controllers are paired correctly to prevent frustration. If you’re adding games via SD card, make sure they’re legal ROMs to stay on the right side of things. Kids using it? Set parental controls if available to limit playtime. For hardware, handle with care – dropping it could damage the HDMI port. Test settings in a safe game first so you don’t lose progress. If something feels off, reset to defaults. Overall, these notes ensure you enjoy gaming without risks or headaches.
Getting Started
Jumping into the Manual Settings HSSGameStick world is exciting, but taking a moment to set it up right makes all the difference. This section covers the basics to get you up and running smoothly. Start with unboxing and connecting, then learn how to navigate the menus. It’s straightforward, but a few tips can save time and avoid common pitfalls. Once you’re familiar, you’ll be playing in minutes.
The device is user-friendly, designed for quick setup. Whether it’s your first retro console or you’re adding to a collection, these steps ensure everything works as intended. We’ll touch on pairing controllers and accessing settings, so you can start customizing early. Remember, patience is key – rushing might lead to missed features. By the end, you’ll feel confident tweaking things.
Think of this as your foundation. A good start means better gaming down the line. Let’s break it down.
Getting started with the Manual Settings HSSGameStick is like opening a time machine to your favorite games. It’s simple, but doing it right sets the tone for hours of fun. First, you’ll unbox it and connect to your TV – easy peasy with the HDMI. Then, pair the controllers and dive into the menus. This part is crucial because it introduces you to the interface where all the magic happens.
For new users, it might feel a bit like learning a new remote, but it’s intuitive. The goal is to have you playing quickly while understanding the basics of settings. We’ll cover initial setup and how to access manual options without overwhelming you. It’s all about building confidence so you can explore advanced stuff later.
Common mistakes? Forgetting to charge controllers or not selecting the right input on your TV. But with these guides, you’ll avoid that. Plus, checking for updates early keeps things smooth. In essence, this section is your launchpad to personalized gaming.
Expanding: The Manual Settings HSSGameStick shines in its ease of use, but a solid start amplifies that. Imagine plugging in and immediately jumping into Mario – that’s the dream. Here, we ensure that happens by walking through each step carefully. From hardware to software, it’s covered.
If you’re tech-savvy, you might skip ahead, but even pros can find useful tips. For example, optimizing connection for low lag from the get-go. Overall, getting started is the first step to mastering the device.
Yes.

Accessing the Settings Menu
To get to the settings menu on your Manual Settings HSSGameStick, from the main screen, look for the gear icon or ‘Settings’ option – usually in the top corner or bottom bar. Use the controller to navigate and select it. Once in, you’ll see categories like display, audio, controllers, and system.
It’s simple navigation with arrows and a select button. Default settings are balanced for most users, but reviewing them helps you see what you might want to change. For example, check the resolution to match your TV. This menu is where all manual tweaks happen, so get familiar.
If it’s not responding, restart the device. This step is essential for customization.
Adding: The settings menu is your control center. From here, you can adjust everything from basic to advanced. Start by exploring each section to see defaults like medium sensitivity or auto-save enabled. It’s good to note these before changing, in case you want to revert.
For beginners, stick to one change at a time and test in a game. This way, you see the impact. The menu is user-friendly, with tooltips on some models explaining options. If your stick has a companion app, you can access settings from your phone too, making it even easier.
Core Manual Settings
The core manual settings are the heart of customizing your Manual Settings HSSGameStick. These are the everyday tweaks that can make or break your gameplay. From how the sticks and buttons feel to the feedback you get, it’s all about making the controls yours. This section dives into sensitivity, remapping, and vibration – things you might adjust often.
Why bother? Because default settings are generic, but your playstyle is unique. Maybe you need faster responses for action games or subtle vibrations for immersion. By mastering these, you elevate simple play to something personal and efficient.
We’ll cover the basics here, building on the setup. It’s not complicated; just a few menus to navigate. Test changes in games to see what works. Remember, you can always reset if needed. Let’s explore how to make your stick feel like an extension of your hands.
Sensitivity and Input Controls
Sensitivity settings control how quickly your inputs register. In the settings menu, find ‘Controllers’ or ‘Input’. Adjust analog stick sensitivity – higher for quick movements in shooters, lower for precise platformers. Trigger sensitivity is similar for games with variable actions like racing.
Dead zones are areas where small movements don’t register, preventing drift. Set them small for accuracy, but not too small to avoid accidental inputs. Response thresholds fine-tune how much pressure is needed.
This makes games feel responsive. Experiment to find your sweet spot.
Button Remapping
Remapping lets you swap button functions. In settings, select ‘Button Mapping’. Choose a profile, then assign actions like jump or attack to different buttons. Save multiple profiles for different games – one for RPGs, another for fighters.
This is great if you’re used to a certain layout or have hand preferences. It can make old games more accessible. Create, test, and switch easily.
Vibration and Feedback
Vibration adds immersion. Adjust intensity in settings – low for subtle feels, high for intense moments. Trigger modes can be linear or adaptive, changing based on game events.
This enhances experience without distraction. Fine-tune for comfort during long play.
Advanced Customization
Once you’re comfortable with basics, advanced customization takes it further. This is where you really make the Manual Settings HSSGameStick yours, with curves, firmware, and optimization. It’s for those who want peak performance or specific setups.
These settings can reduce lag, improve graphics emulation, and more. It’s a bit more technical, but rewarding. We’ll cover response curves, software integration, and tips for speed.
Approach with care – backup settings first. It’s fun to experiment.